


The Lemon 3-zone cymbals are compatible with all Roland modules and all modules that are compatible with Roland cymbals. However, in some cases a manual change off the internal wiring-connector on the cymbal needs to be done to make the 3-zone cymbal work.
First a little bit of background on this issue
When Roland started making their drum modules, they defined some internal wiring scheme to be used for the 3-zone rides. This same scheme was used for all modules up to, and including, the TD-30 (TD-17, TD-25, TD-27, TD-50 and TD-50X). For all new modules that came after the TD-30, they decided, for some unknown reason, to switch the internal wiring of ride cymbal in the modules. For modules up to, and including the TD-30, the wiring of the input/output connectors was Bow / Bell and Bow / Edge. For all modules after the TD-30, the changed the wiring of the input/output connectors to Bow / Edge and Bell.
Symptoms
It is easy to check if your module uses the reversed wiring scheme internally for the Ride cymbal. When the cymbal is connected in a correct way, you hear the bell-sound when you hit the edge and the edge sound when you hit the bell. So the sounds are reversed.
The fix
The wiring of Lemon 3-zone ride cymbals are setup to work with the first version of the wiring scheme of the TD-30 and earlier modules. Unfortunately Lemon does not include an external switch to change this setting.
To change the internal wiring of the Lemon cymbal, there is an easy fix that can be done in a few minutes by following the steps below
- Turn the cymbal upside down and remove all screws from the outer ring (image 1). For the 15 inch 3-zone ride, there is one screw placed under a sticker.
- Remove all screws from the inner ring and keep them separate from the screws from the outer ring (image 1)
- Open the cymbal by removing the plastic cover.
- Now you can see the two connectors with the internal wiring
- Gently remove the white connector from the left socket and gently place it in the right socket (image 2).
- Put the plastic cover back in place.
- Put back the screws of the outer ring and inner ring, but beware to not overtight the screws as that can brake off the internal plastic socket.
- Test your ride cymbal
- Happy drumming
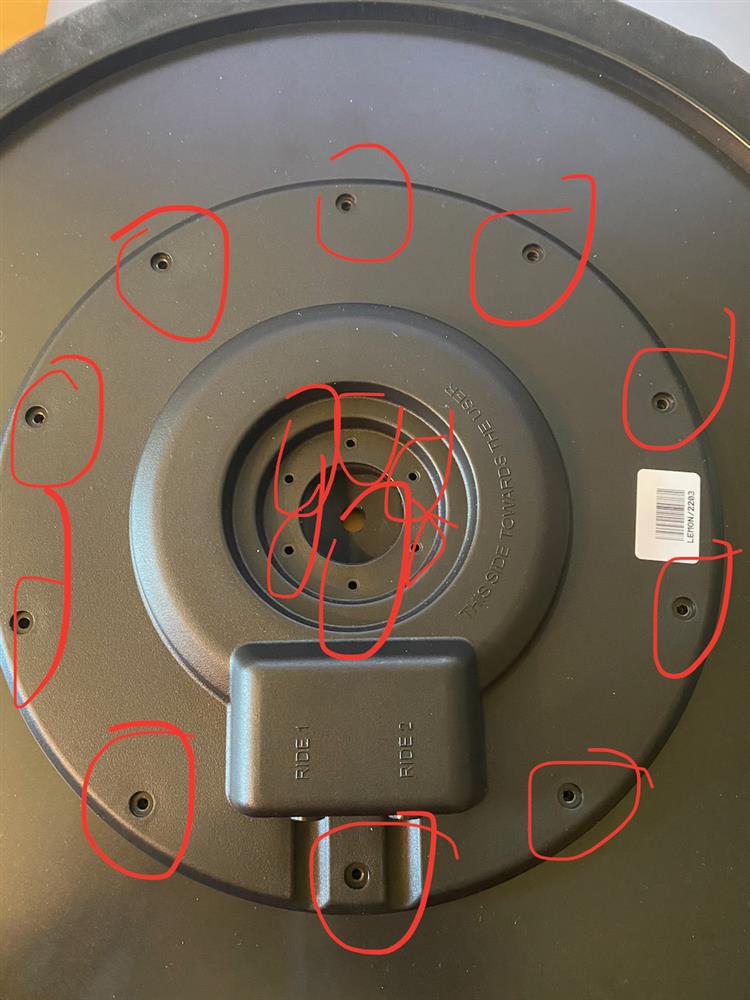
Image 1 - Opening the cymbal
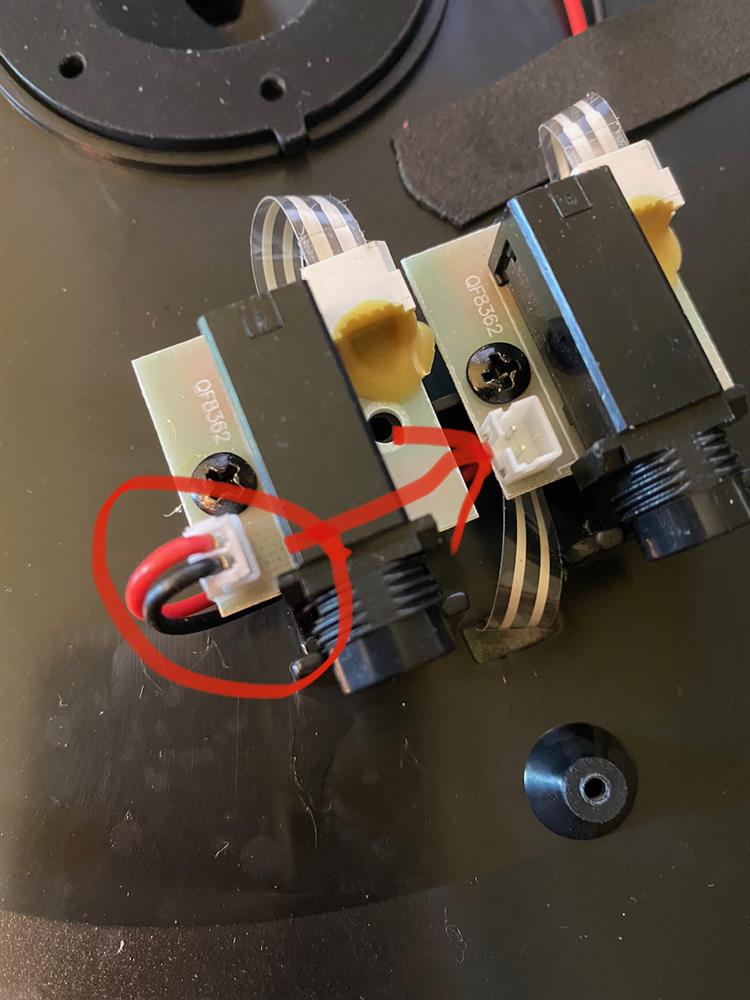
Image 2 - changing the internal connector


